On a brighter note, the days are getting longer and it feels like spring is waiting patiently for winter to pack her bags and move on. It's still cold, the threat of snow and ice will be around for another 2-3 months but the sun is warmer, the days are longer and there's less winter ahead now than behind us. I think when you live less north than Minnesota or other northern states, you don't notice the earth's angle to the sun as dramatically. Up here, on June 26, we have almost 18 hours of daylight. On December 26, we have less than 10. I have a window in my office that overlooks a hallway that overlooks an outside window. There are four weeks each year, two in the spring, two in the fall, where the sun's angle hits metal flashing on the roof of the building across the street that fires laser beans of sunlight into my office and nearly blinds me. I have to close my blinds the beams are so strong! That day is coming fast!
Despite my yearnings for spring, I still cook like it's winter. As promised, I'm going to share my Wine Braised Beef recipe with you. This is a recipe that my Mom used to make, my only riff on it is that I use shallots instead of onions and wine instead of all broth. It's delicious and a really flexible recipe (as I'll describe late) that can be changed to suit your tastes and pantry stock! This is a great recipe to have in your arsenal. You can really dazzle friends and family with this one.
Wine Braised Beef
Preheat oven to 325 degrees. Remove middle rack to make room for dutch oven or large oven proof pan with a tight fitting lid that needs to sit in the bottom 1/4 of the oven.
Olive Oil
4 pounds boneless Beef Chuck Roast (The one pictured in this recipe was 4 1/2 pounds)
1/3 cup Flour mixed with 1 teaspoon ground Black Pepper
1 large Shallot, chopped in 1/4 dice (You can sub one small onion and 3 large garlic cloves)
3 Bay Leaves
2 T Worcestershire Sauce
1 bottle Red Wine (Inexpensive is great. I used Shiraz. It's excellent with Burgundy, Merlot, Cabernet)
3 cups Beef Stock or Broth (low sodium)
For the sauce later:
Kosher Salt
2 T Butter
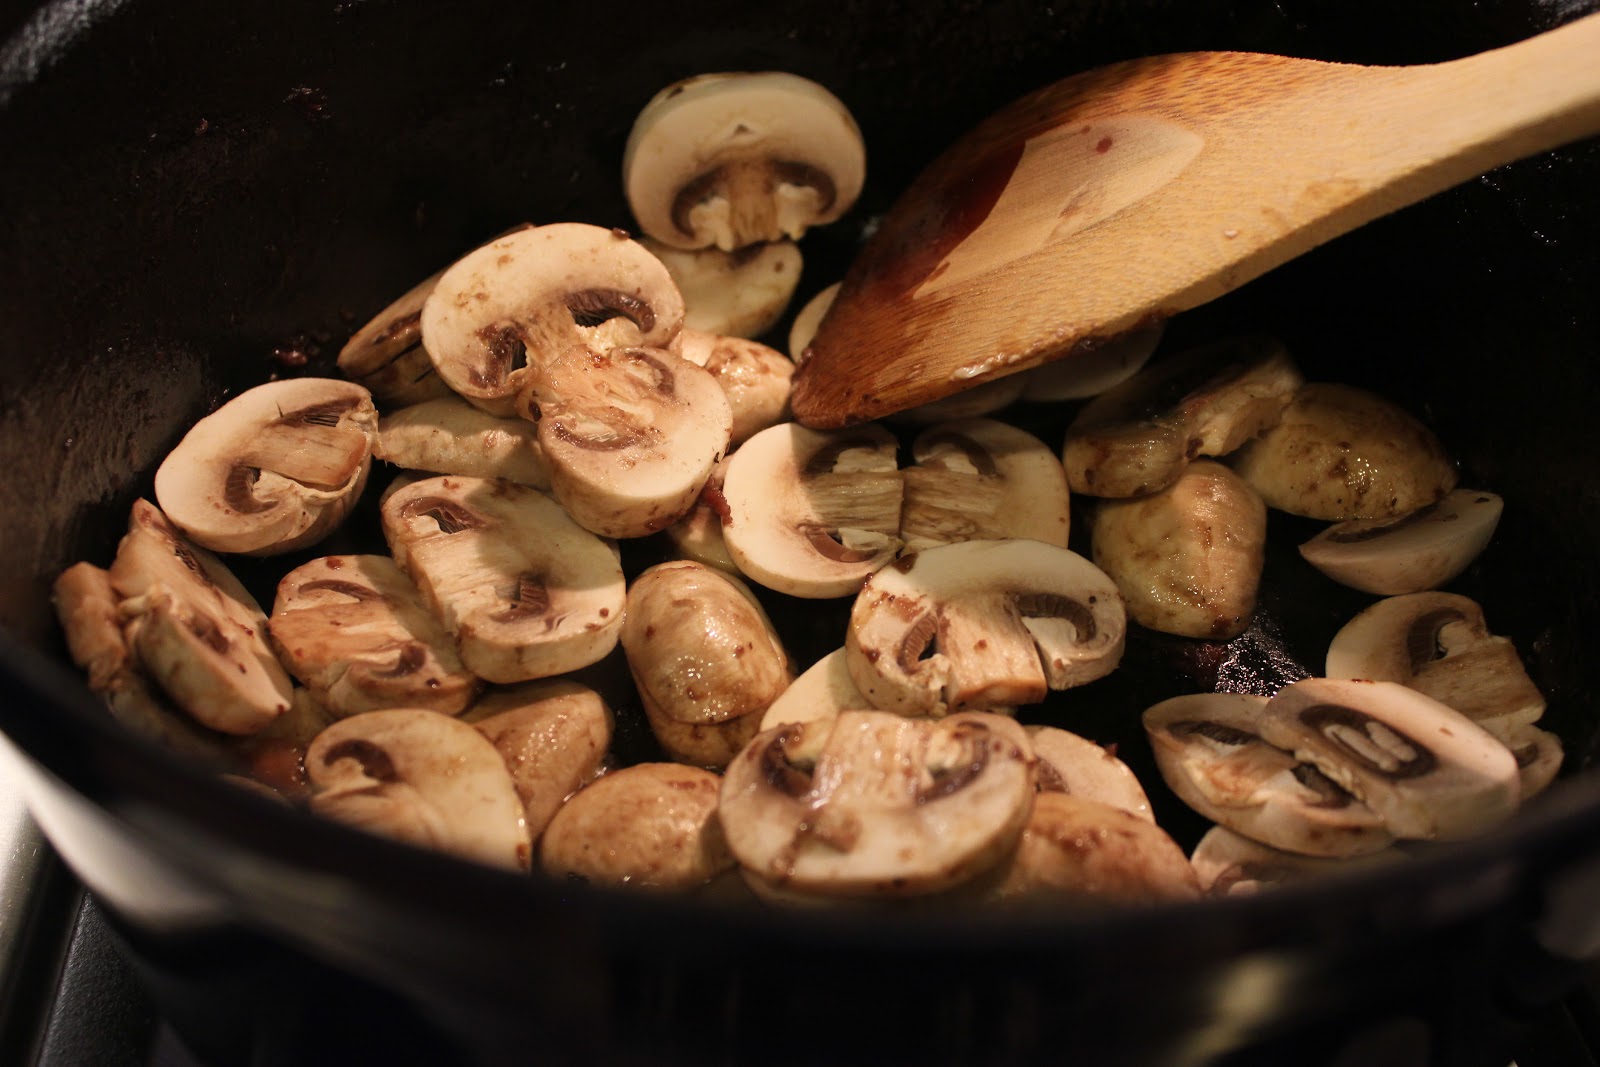
1 pound Mushrooms, thickly sliced
2 T flour
Prepare the meat: Cut the roast into three equal pieces. Cut away any large solid bands of fat, but leave the inner marbling and some smaller pieces. The rind of fat around the outside is not necessary to the end result of this dish other than making the gravy greasy.
In a cast-iron Dutch oven or other large heavy oven-proof pan with a tight fitting lid, heat enough olive oil to cover the bottom of the pan. I used about 4 T of olive oil. I do this over medium heat until I am ready to brown the meat, then I turn it to high. I will adjust the heat as needed during the browning process.
Mix the flour and black pepper together and dredge the beef pieces in the flour, coating all the sides including the cut sides. Knock off the excess flour.
When a drop of water skitters in the pan, add your beef--but do it in batches. Crowding the beef in the pan will steam it and not brown it. This is a messy process as the beef and oil spatter! (I hate cleaning up a mess so I covered my stove with foil ahead of time!) Be patient--there is chemistry going on here! When the meat is sufficiently browned, it will release itself from the bottom of the pan and will be easy to turn! Using tongs flip the meat and brown all the sides including the edges. If the meat sticks, give it a little more time. When browned, remove the meat to a plate, add more olive oil to your pan as needed and repeat til all your meat is well browned and resting on a plate.
Turn the heat to medium and add more olive oil if necessary (you may not need it) and saute the shallots (or onion and garlic) until just lightly browned. You just want to give them a little color. Scrape up as much of the browned bits on the bottom as possible! That's the good stuff!
When your shallots (or onion and garlic) are lightly browned, turn off the heat and push the shallots to the middle of the pan and add your beef pieces back in around them. Pour any accumulated juices from the plate into the pan.
Here's when you have to eyeball a little! You will want to add a 2 to 1 ratio of wine to broth to the pan. Depending on the thickness of your beef--you want to add enough wine and broth to JUST come to within 1/2 " of the top edge of the beef. You do not want to fully cover or immerse your beef in liquid--just enough to almost come to the top. I used about 3/4 of the bottle of wine and 1 cup or so of broth.
Add the Bay Leaves and Worcestershire Sauce and give the pan a hearty sprinkle of freshly cracked pepper. Cover and put in the preheated oven. Sit back and let the magic happen for about 3 hours. After three hours, carefully remove the lid (watch for steam!) and test your meat for doneness. A large fork or thin knife inserted into the thickest part of the meat should go in easily or the meat should pull apart with little resistance. If it's still a little firm or resistant, cover and give it another 45-60 minutes. That should be plenty of time! This is the hard part because your house is going to smell insanely good and you have to be patient and WAIT for dinner!
Remove the pan from the oven and carefully lift the beef out of the liquid and put on a rimmed dish and cover with foil. Set aside.
CAREFULLY pour the cooking liquid into a mixing bowl. The narrower the bowl the easier it will be to skim the accumulated fat off the top. Set aside and allow to cool.
Over medium heat, add the butter to the pan. When it's melted and sizzling, add the mushrooms and saute until lightly browned. Sprinkle 2 T flour over the mushrooms and stir to remove any lumps. When the flour is incorporated, add the remaining bottle of wine and another 1 cup of beef stock or broth. Bring to a full boil, stirring constantly to prevent sticking and clumping about 5 minutes. This will reduce the wine and thicken the gravy. When the gravy is thickened, reduce heat to the lowest warm setting.
Returning to the saved pan sauce, carefully skim any accumulated fat off the top. Remove the bay leaves. You can strain the pan sauce if you wish, I like to leave the little bits. Add the pan sauce to the mushroom gravy. Taste the gravy. This is when you'd add a generous sprinkle of kosher salt to taste.
Place meat on a cutting board and cut into serving sizes. You can serve this with mashed potatoes, rice, polenta or as I did, with parsley buttered egg noodles. You can add the meat back into the gravy or as I did, put the noodles in a large bowl, add the beef to the side and drizzle the whole bowl with the wine mushroom sauce. It was succulent and delicious.
This keeps well and you can reheat it in the gravy. You can also create a lovely beef stew by steaming carrots and green beans and adding that to the beef and gravy as a change for leftovers.

You can also use beer instead of wine, onions and garlic instead of shallots and you can add thyme or rosemary along with the bay. I wanted something straightforward and classic.

You can see my foil protection! And look at that browned goodness! You know that stuff that sticks to the bottom of the pan that gives everything such a great flavor?
That's called fond. I think it's because we're so fond of it!

You don't need to cook your shallots past this point--just gently sauteed.

Add the liquid just to within 1/2" of the top of the meat.

YUM YUM YUM

This sauce is fantastic. Savory and little tangy from the wine.

MMMMMMM

Make this, it's good!!!
Thanks for sharing that - and some of your thoughts after the loss of your parents. Let it all out I say! And include a recipe with it. ツ
ReplyDelete